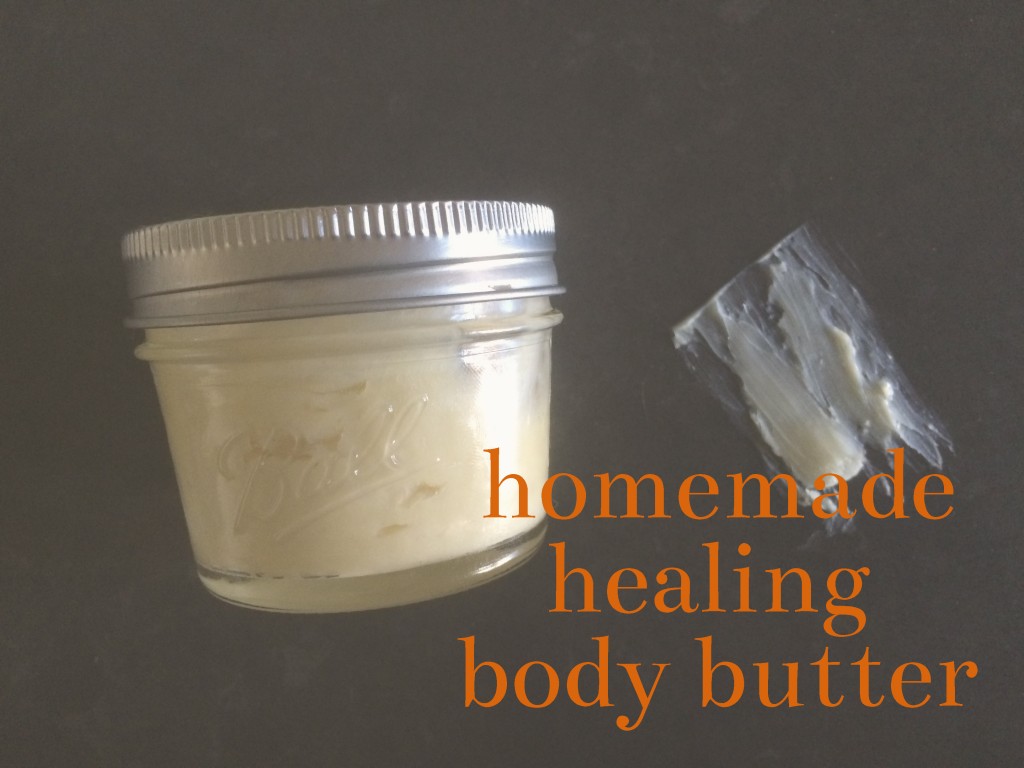
As a kid, summer meant never not being in a pool (AZ life, hollaaa) but at the end of a carefree day, I would come home with patches of itchy, dry skin. This summer has been reminiscent of my childhood; traveling, being outside all day, nothing to worry about except which type of ice cream to devour for dessert. But spending so much time in the elements has returned my skin to that scaly fishchild state. One of the first things I did when I got home from vacationing was whip up a batch of this body butter/lotion, et voila, my skin was renewed!
This homemade body butter soothes virtually every skin irritation issue; dry skin disappears, rashes and bites are calmed and it also heals and prevents scarring, which is wonderful for my darker, scar-prone skin. This would also be great for preventing stretch marks and healing burns.It’s thick and luxurious due to the incredible healing properties in these rich ingredients. Not to mention it smells like chocolate frosting (no, it doesn’t taste like frosting..not that I’ve tried it or anything…*looks away*).
If greasy lotion bothers you, just make sure to slather it just before you go to bed to give your skin plenty of time to soak it up.
Healing Body Butter Recipe
To get the most out of any homemade products, make sure to purchase raw ingredients that are responsibly-sourced and organic. I purchase mine from Mountain Rose Herbs, Lassen’s (LA area), or Whole Foods.
1/4 cup Shea butter (improves elasticity, collagen production, intense moisture, anti-inflammatory)
1/4 cup coconut oil (healthy fatty acids, rich in vitamins K, E and iron, anti-bacterial/anti-viral)
1/4 cup cocoa butter (antioxidants, rich in vitamin E, caffeine said to help firming/reduce cellulite)
1/4 cup jojoba or sweet almond oil
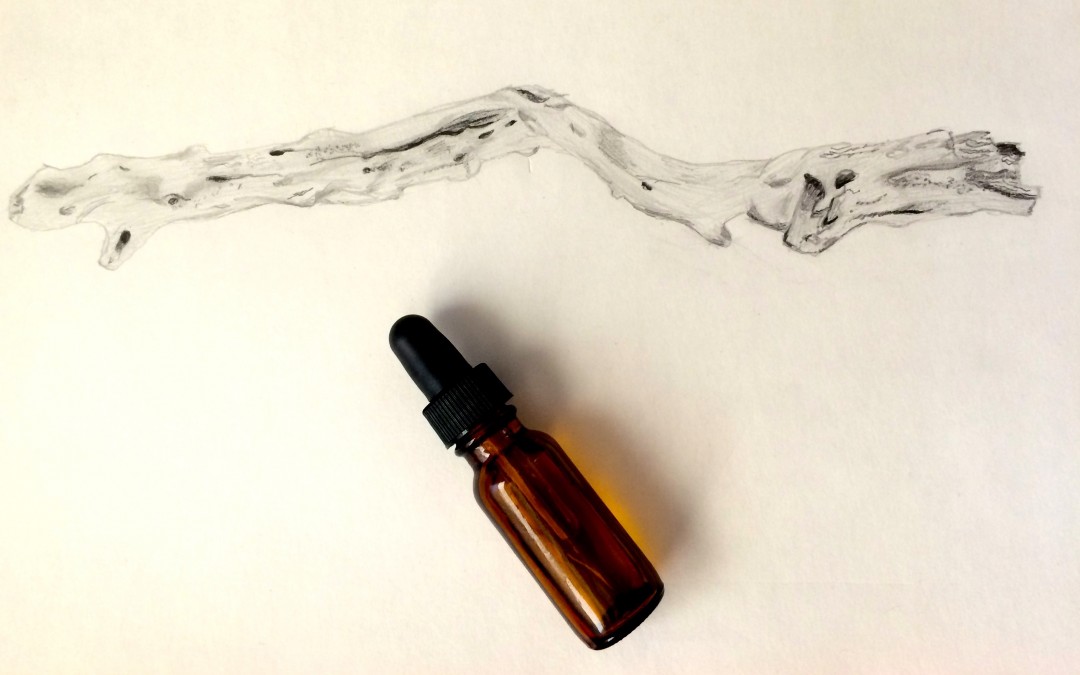
10-15 drops of essential oils of your choice (I prefer rose or neroli)
Hand mixer (optional)
Combine the first four ingredients in a sterilized glass bowl and melt using a double boiler. Once melted, let the bowl cool down then place in fridge until the ingredients solidify (about 45 min-1 hr).
Optional, yet highly recommended: use a blender to whip ingredients for about 5-8 minutes, until a frosting-like consistency is achieved.
Mix in essential oils of your choice, if desired. When you choose your oils, keep in mind that there will be a strong chocolatey smell from the cocoa butter, so they should pair well with that. Slather this on after exfoliating/dry brushing and feel like a queen. Store in an airtight glass jar, like a small mason jar. Use within 1 month. Enjoy! You’ll definitely be feeling yourself.
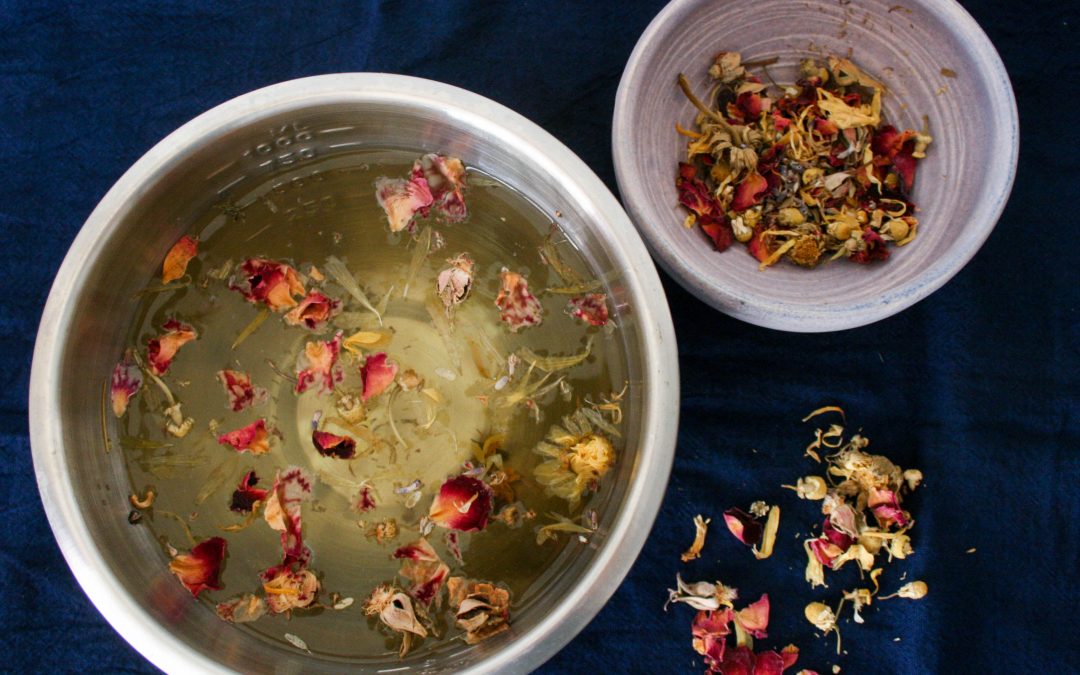
In the spirit of spring cleaning, I’ve been purging and simplifying all aspects of my life. Clearing out the unnecessary really does clear the mind (can you tell I’ve been doing a ton of Yoga? Hehe). While I love luxurious, rich products, lately, my skin has been asking for minimalist products, and to just let it be. Trying to be more in tune with what it needs, I’ve been using my own blend of oils for cleansing and makeup remover and my skin has responded really well. I thought I’d share this since it’s easy to make and super inexpensive.
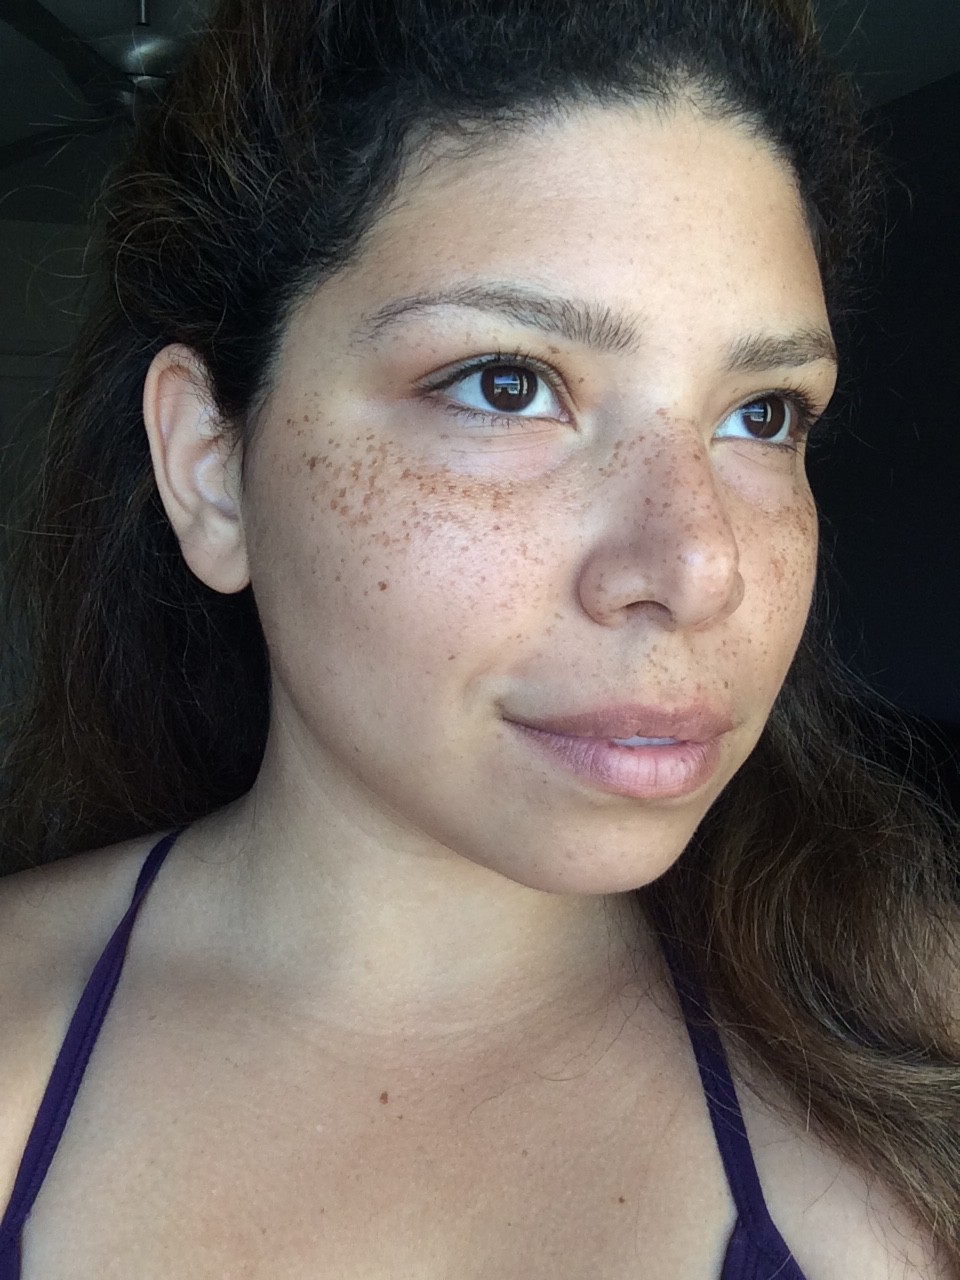
Here’s my no makeup selfie, post oil cleansing. See, dewy, happy skin!

I’ve chosen these three oils because they give skin a balanced ratio of oleic (moisturizing) and linoleic (great for cleansing and preventing blemishes) fatty acids, and would work well for normal to dry skin types. If your skin is acne prone, I would suggest reducing the amount of coconut oil and doubling the amount of grapeseed oil since it’s higher in linoleic acid, the type of acid that acne prone skin lacks. This is just a base formula, so feel free to play around with the ratio of oils. And since I also use this as my makeup remover, the only essential oil I’ve included is lavender that will not irritate the delicate eye area.
Basic Oil Cleanser Ingredients:
1 tsp coconut oil
1 tsp grapeseed oil
1 tsp sweet almond oil
optional: 3-4 drops lavender essential oil
Add oils to a small glass jar then stir or gently shake to blend (I use these amber dropper bottles from the Container Store). Add 3-4 drops of lavender, if desired.
To use, apply a few drops to dry skin. Massage away dirt and makeup for 30-60 seconds (I like to add a few drops of water to emulsify), then wipe away with a gentle microfiber cloth or my favorite, this cute lil’ konjac sponge. Follow up with a toner and/or moisturizer.
I hope this inspires you to simplify in some way!

A few readers have asked about products and D.I.Y.s that will help with acne situations. I struggle to answer these questions simply because acne is a symptom of a larger internal imbalance. Based on my research and reading more holistic approaches to managing acne and blemishes, this is a two part problem: there’s the stuff you put on the outside that can either soothe or aggravate acne, but the more important part is dealing with the underlying causes which are diet and stress levels because they affect hormones, on which this post will focus. In part II, I’ll provide topical oils and products that can help clear up the skin. It’s a long one, so grab a beverage and settle in.
I have been rather lucky; I’ve never dealt with serious acne, even as a teenager. I did deal with a moderate case of cystic acne about two years ago in my late twenties. My attempt in this post is to pool my research and to share what worked for me, which I learned from holistic approaches.
Most skin care products formulated to eliminate acne can worsen the condition, due to the drying ingredients. The skin is slightly acidic and most mass-produced products mess with the pH balance or completely strip skin of its natural oils, sending the skin into panic mode. While what we put on our skin is very important to combat environmental damage and to retain moisture, topical products are only a fraction of the cause of most acne cases.
Most dermatologists and Western doctors do not treat the skin as an integrated system and will prescribe detrimental drugs like peeling agents, Accutane or, for women, birth control pills to “fix” hormonal issues, while completely ignoring the underlying cause(s). With this method of treatment, blemishes on the facial skin are managed temporarily, but the food allergy or the high-stress lifestyle only continues to fester in the body in other ways. More pollution has been added to the body from these serious, disruptive medications or chemicals that may bring another set of side effects into the picture. Now, we have a toxin masking one symptom, only to push the sickness to cause harm in another part of the body.
Diet
Yes, you are what you eat, and it will show up on your skin. Many naturopaths and Ayurvedic practitioners will say that acne begins in the gut. The overproduction of sebum and bacteria is just the effect of acne. Because our skin is a sensory organ, it is constantly processing what comes in and out and is the best way to tell if someone is healthy at first glance. You’ve seen it: the person that has naturally glowing, dewy skin…that’s a reflection of a healthy internal ecosystem. When we ingest toxins or foods which are difficult for our bodies to digest, this shows up on our skin because what happens in our gastrointestinal system directly affects our hormones. The profound relationship between the food we eat and hormone balance is just now being understood. The resulting inflammation, toxicity, etc. is the root of the problem.
I was surprised to discover that acne is very much a U.S. problem because of the prevalence of processed foods in the average American diet. The rest of the world doesn’t consume it in the large amounts that the typical American does. There are hundreds of studies that show relief of participants’ acne conditions when placed on a low-glycemic diet (no grains, sugars, processed foods, etc.). This is because our bodies are more efficient at digesting complex carbs. Many scholars are starting to believe that it has more to do with one’s environment than their genetics. Although, some will tolerate dairy and grains, or even if they have trouble processing, it may show up as another ailment like weight gain or IBS, rather than blemishes.
Stress
The other main acne trigger is our emotional well-being.
During the last six months of grad school, I dealt with cystic acne, those pimples that form underneath the skin and stay there for a solid week or so. There’s nothing you can do except wait it out 🙁 It was the pits. This horrible bout of adult acne happened because I was constantly stressed, neglected my body, and ate poorly. After graduation, I got back into a routine of eating and exercise/yoga and I haven’t had a cystic pimple since. However, I did have some serious scars from those suckers. I researched natural ways to fade scars and hyper-pigmentation and found out about rosehip seed oil, which I’ll talk about in part II.
The condition of the skin reflects what’s going on inside our bodies. Any imbalance, or lack of self-care will show up on your face in a few days. I still experience normal hormonal breakouts that coincide with my cycle, but I only get one or two spots around the jawline, and they are manageable and go away within a couple days.
What to Do?
1. Check your hormones:
Identifying any hormone imbalances can clue you and your doctor in on not only why you’re experiencing adult acne, but other issues. If you have insurance, ask your doctor to check for imbalances during routine blood work to identify or rule out any serious issues, like a thyroid problem.
If your tests come back “normal” and you still feel “off”, then definitely listen to your gut and look into seeing an alternative medicine practitioner, like an acupuncturist. Most major cities offer sliding scale practices, so those of us without this coverage can still seek the benefits without going broke. If you’re in L.A., try this wonderful place!
Whatever you decide, I also would recommend the book Balance Your Hormones, Balance Your Life by Claudia Welch. She describes the symbiotic functions of hormones and writes about how stress, food and synthetic medication and hormones wreak havoc on the hormones of modern women. She also offers solutions rooted in Ayurvedic, Chinese, and Western medicine. My mind was blown after reading this and is must-read for every woman.
2. Exercise your lymphatic system
The lymphatic system does not have a pump, like the cardiovascular, so the system can be sluggish and not working to purge toxins and junk out as efficiently as possible. If you are sedentary, so is your lymphatic system.
– Exercise – take a vigorous Vinyasa flow class
– Drink water – this will help flush out nasties
– Dry brush – the nodes sit just underneath the skin, and the long, exfoliating strokes encourage blood flow to the area.
3. Clue in to your skin
From the lovely athletic line and my former employer (yay!) Lorna Jane blog, the location of the breakout can clue you in on whats going on internally. For example, cystic acne is more hormonal and stress related. While topical solutions may help temporarily, there’s probably an imbalance of some sort happening.
Chin and jaw line: Hormonal, especially when the spots go down the neck.
Forehead: Bowel congestion and constipation.
Between the eyes: Liver
Temples: Gallbladder
Cheeks: Various causes, including genetic
Back: General toxicity and candida
Whiteheads on the face: Can be digestive
Large cysts on the face (without heads): Indicates a hormonal imbalance
4. Eliminate known acne-causing foods
While some people say that detoxing is a great idea to get rid of acne, I’m not a fan because this is not a sustainable solution. Yes, your acne may subside, but you then have no idea which foods were triggering the blemishes.
Instead, there’s so much literature that supports eating a low-glycemic or dairy-free diet. Grains and dairy can cause inflammation and therefore trigger bacteria, which shows up on your skin.
– Try cutting out grains for a week. If that doesn’t help, try cutting out all dairy.
I’ll post part two next week, filled with blemish and scar-reducing products and DIYs that have worked for me.
It just kills me when I have to spend money on gas, laundry, or deodorant. And while I did find an effective natural deodorant, Soapwalla, (read about this and the danger of most deos here) it’s $14 bucks a pop and I’ve been trying to balance my beauty splurges by committing to D.I.Y. one beauty product for each expensive product I buy.
I ran out of my trusty Soapwalla and after a few days bare-pitting it and some gentle encouragement from my dear fiancee to perhaps set a higher standard of personal hygiene for myself, I finally broke down and gave homemade deodorant a shot, not really expecting it to be all that effective.
I put this formula to the test with a hike and a few yoga classes and holy kerschmolies, it works! And not in a funny Portlandia way. Really.
Also, this is SO cheap to make and smells like coconut-orange frosting. So here are the tools you need to get into the homemade deodorant game:
Shea-Coconut Deodorant
1 tbsp Shea butter
1/2 tbsp coconut oil
1 tbsp arrowroot powder
1-2 tbsp baking soda
2-3 drops tea tree oil
5-10 drops of essential oils of your choice (I used 3 drops peppermint and 5 drops bergamot)
1 sanitized small glass jar that you’ll use to store the deodorant
1. Add Shea butter to glass jar and heat until softened (I microwaved for 20 seconds – feel free to use a double boiler; I was too lazy to do this when I made it)
2. Add all ingredients except for essential oils and stir, making sure the powder and baking soda are mixed thoroughly. Add more baking soda, if desired (I prefer a thicker paste consistency)
3. Gradually stir in essential oils to achieve the desired strength of scent
Your homemade deo is now ready to keep your pits company! The tea tree oil and coconut oil act as natural preservatives but make sure to use within 2 weeks so the deodorant stays fresh and effective.